
I had so much fun making the cards for today's post! I chose the Save The Date Collection to work with-
mainly using the 6x6 patterned paper pad with lots of the beautiful embellishments!
My first card features one of the stamps from the Save The Date stamp set:
I feature another beautiful stamp from the Save The Date set on my next card:

 www.craftygrl.blogspot.com
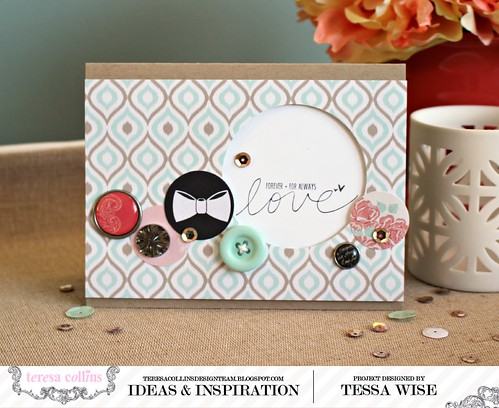
My first card features one of the stamps from the Save The Date stamp set:
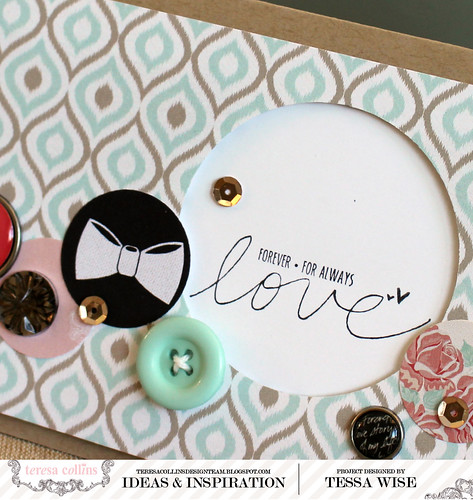
I love the sentiment and wanted it to stand out on my card. I stamped it onto white cardstock with black ink and adhered it to my brown card base. Next I cut my patterned paper to fit over the center of the card. I punched the circle over where the sentiment was and used pop up foam adhesive to adhere it to my card from to frame the sentiment. It gives the card a little extra dimension!
I chose some ephemera pieces, stickers, jewels, brads, buttons, and sequins to embellish this card- they are all circles but in many different sizes that work well together.
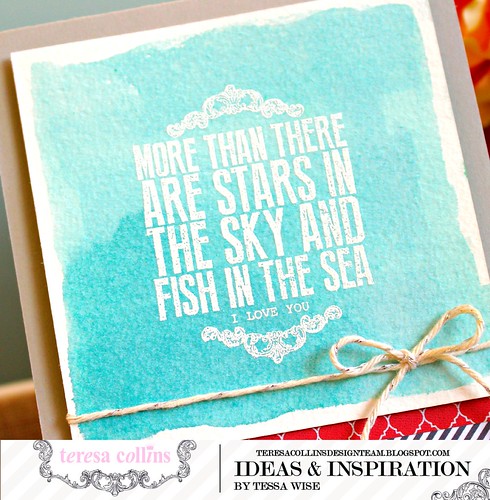
I feature another beautiful stamp from the Save The Date set on my next card:
I started with a tan card base and added the strips of patterned paper near the bottom. Next, I took a square of watercolor paper and painted some of my favorite blue stamping ink onto it with an aqua brush. I dried it with an embossing gun. Once it was dry, I stamped it with Versamark ink and heat embossed the sentiment with white embossing powder. The sentiment really shines! I added a little bit of gold twine to finish off the look.
It is such a pretty stamp isn't it? I really love it!
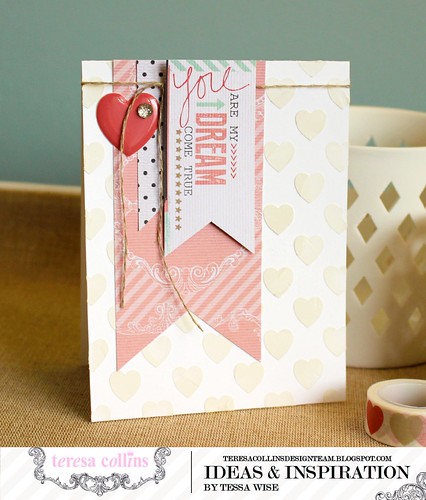
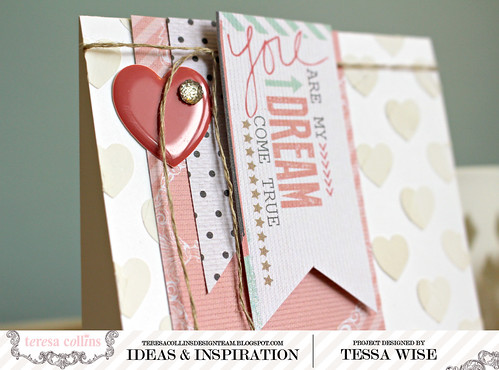
And one more to share today- I used some of the great Basically Essentials Modeling Paste and Stencils on this one:
And one more to share today- I used some of the great Basically Essentials Modeling Paste and Stencils on this one:
I started with a crisp white card base and used the hearts stencil with the paste. I love the texture! It creates such a pretty pattern on the white! Once the paste was dry, I added a banner of the pink patterned paper, the smaller polka-dotted paper, and a banner from the ephemera pack. I tied a bit of linen thread around the top and finished it off with the epoxy heart and jewel.
I am so happy with how these turned out! I love using different techniques on each card- they were so fun!! I hope you try out one or all of these techniques for yourself!
Thanks for joining me today!

They're ALL beautiful, Tessa! Teresa is lucky to have you!!
ReplyDeleteYour cards are always so amazing, I love them!! Great job Tessa!!!
ReplyDelete